Rest Client 是一个用于测试 Restful api 服务的工具。开发人员只需要按照规范编写请求,
就可以向服务器发送 http 请求,并显示服务器响应
Webstorm 默认支持 Rest Client 配置,开箱即用
首先创建一个简单的 web server,它支持 GET 和 POST 请求
// server.mjs
import http from "node:http"

const PORT = 3002
const HOST = "localhost"

const request_method = {
  get: "GET",
  post: "POST",
}

const users = [{ name: "qin", age: 18 }]

const server = http.createServer((req, res) => {
  res.writeHead(200, {
    "Access-Control-Allow-Origin": "*",
  })

  if (req.url === "/users" && req.method === request_method.get) {
    res.write(JSON.stringify(users))
    res.end()
  } else if (req.url === "/create/user" && req.method === request_method.post) {
    switch (req.headers["Content-Type"]) {
      case "application/json":
        handlePayload(req, res)
        break
      case "application/x-www-form-urlencoded":
        handleQueryParams(req, res)
        break

      case "form-data":
        handleFormData(req, res)
        break
    }
  }
})

server.listen(3002, () => {
  console.log(`server is running at ${HOST}:${PORT}`)
})

function handlePayload(req, res) {
  let payload = ""
  req.on("data", (data) => {
    payload += data
  })

  req.on("end", () => {
    const { name, age } = JSON.parse(payload)
    if (name && age) {
      res.end("create user successfully")
    } else {
      res.end("failed to create user")
    }
  })
}

function handleQueryParams(req, res) {}

function handleTextByFormData() {}

function handleFileByFormData() {}

function handleFormData(req, res) {}
如上图所示,使用 node.js 提供的 http 模块,创建一个简单的 Web server, 它支持查询所有的 users 和创建新 user。
下面使用 Rest Client 调试来调试这两个接口
将光标聚焦项目工具窗口,点击 Scratches and Consoles 选项,使用 command + n 快捷键,调出 New 菜单,如图所示

添加以 .http 扩展名的文件,以 index.http 为例
# GET
点击 图标,显示 Add Request 弹框,
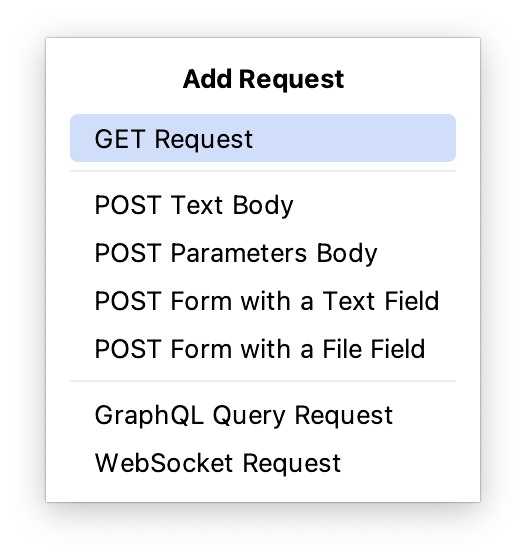
选择创建 GET Request 请求,如图所示
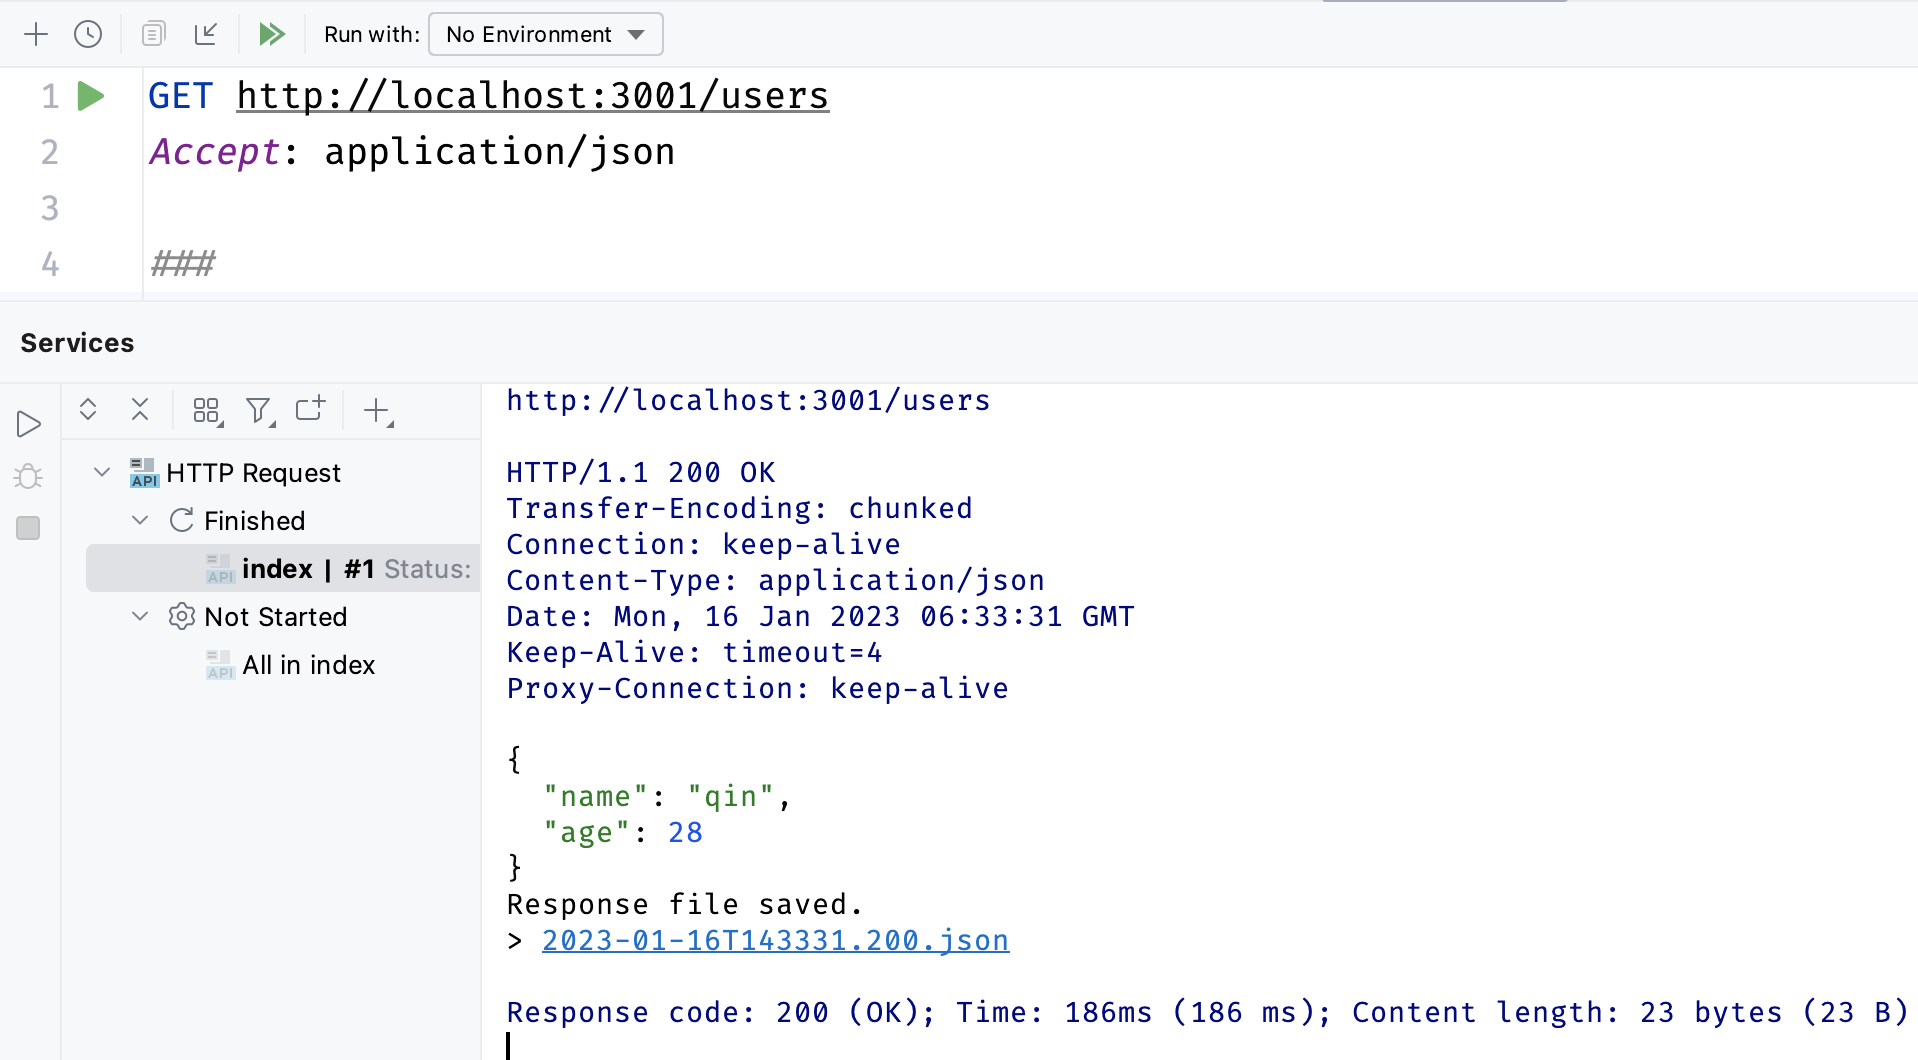
点击 图标,HttpClient 发起 GET 请求,请求结果如下图所示
# POST
POST 请求有四种传参方式,分别是 application/json、application/x-www-form-urlencoded、multipart/form-data 和 text/xml,下面详细讲述如何在 Rest Client 中使用四种传参方式
# application/json
application/json 就是常说的 json 传参的数据格式。点击 POST Text Body 选项,Rest Client 会自动创建对应的示例,
开发人员根据实际接口修改对应字段
# index.http

POST http://localhost:3002/users
Content-Type: application/json

{
  "name":"qin"
  "age": 28
}
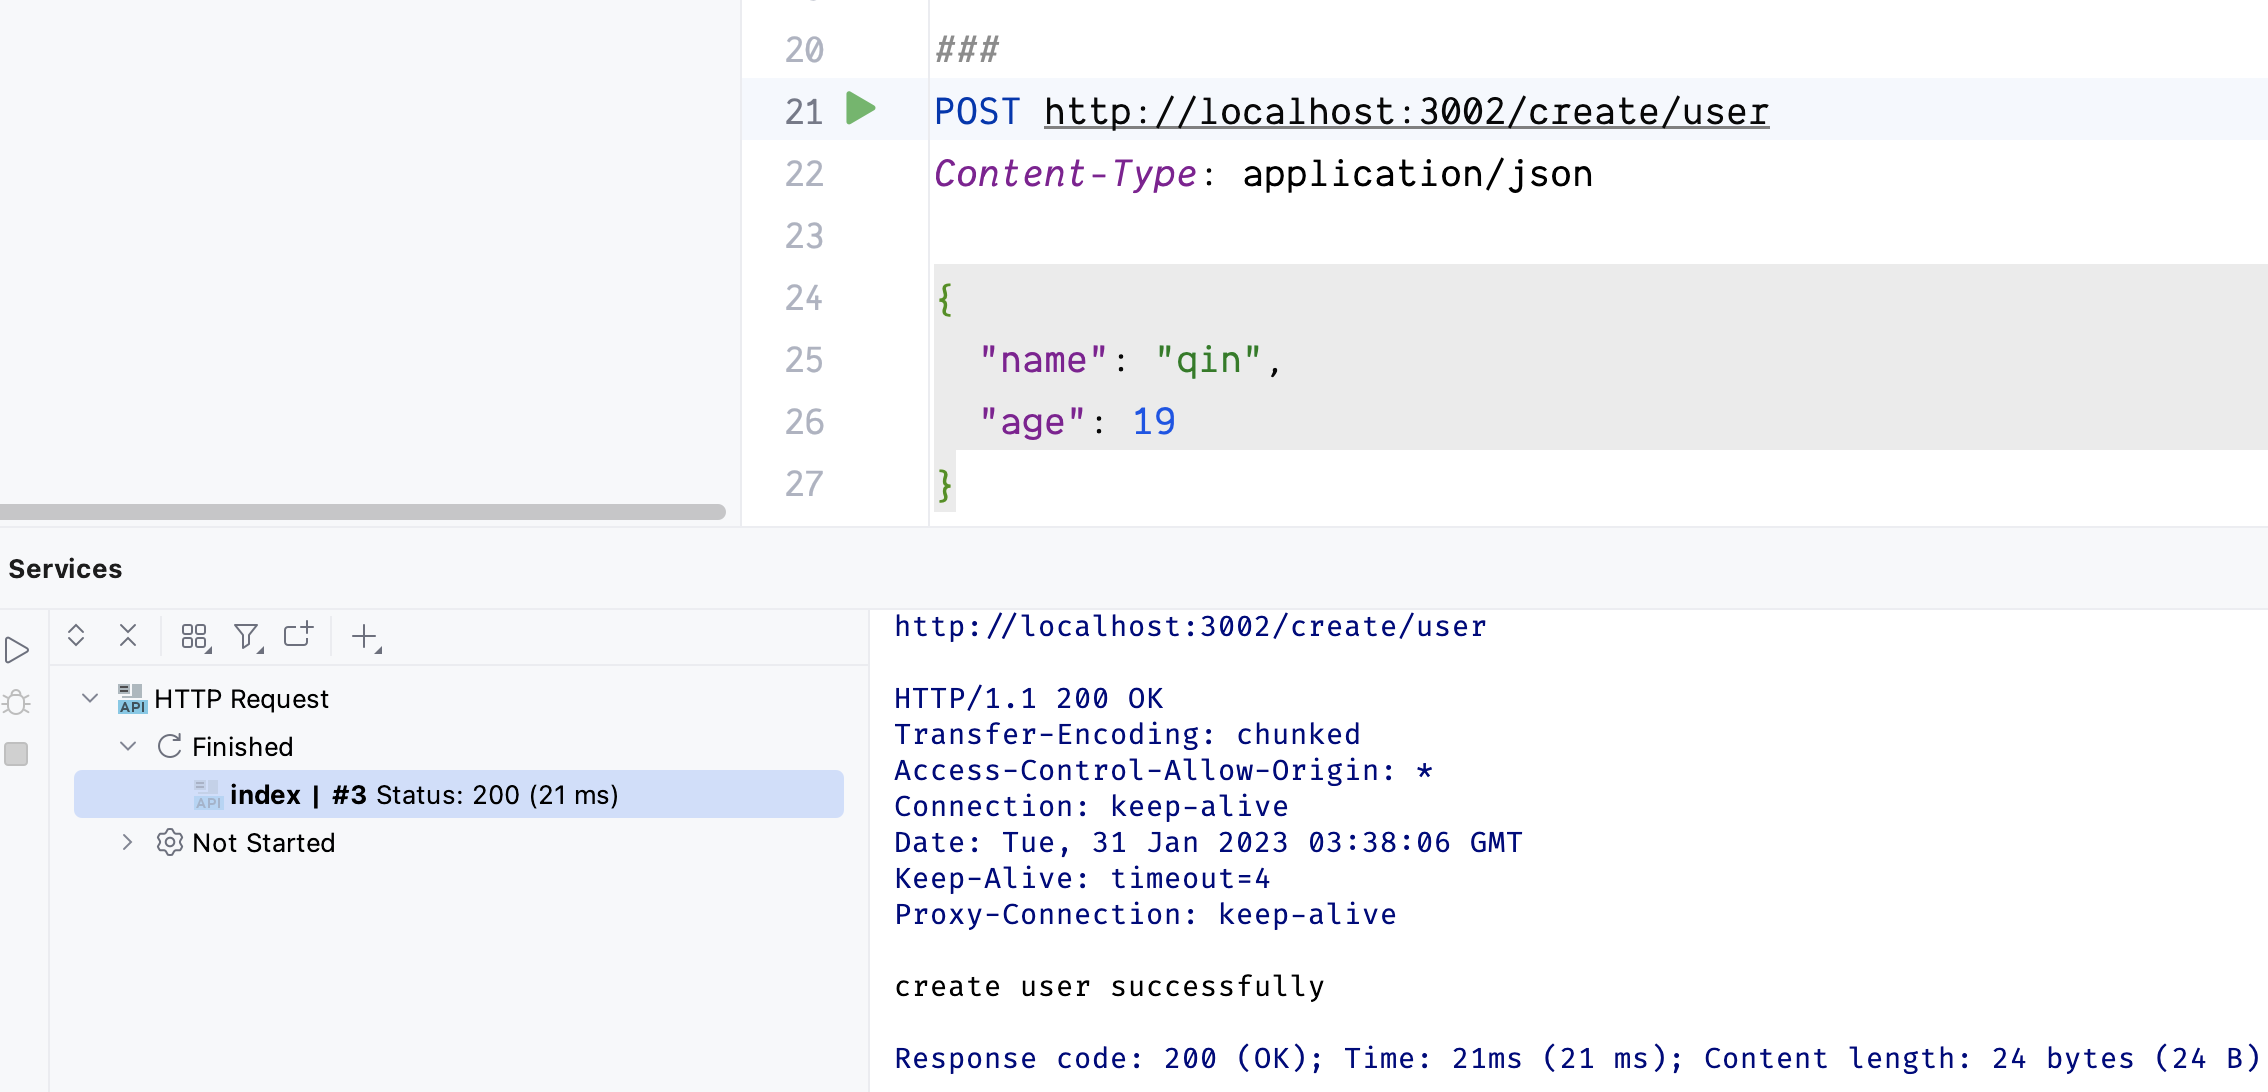
点击 图标,Rest Client 发起 POST 请求,请求结果如下图所示
# application/x-www-form-urlencoded
application/x-www-form-urlencoded 就是常说的表单传值或 query 传参
# index.http
POST http://localhost:3002/create/user
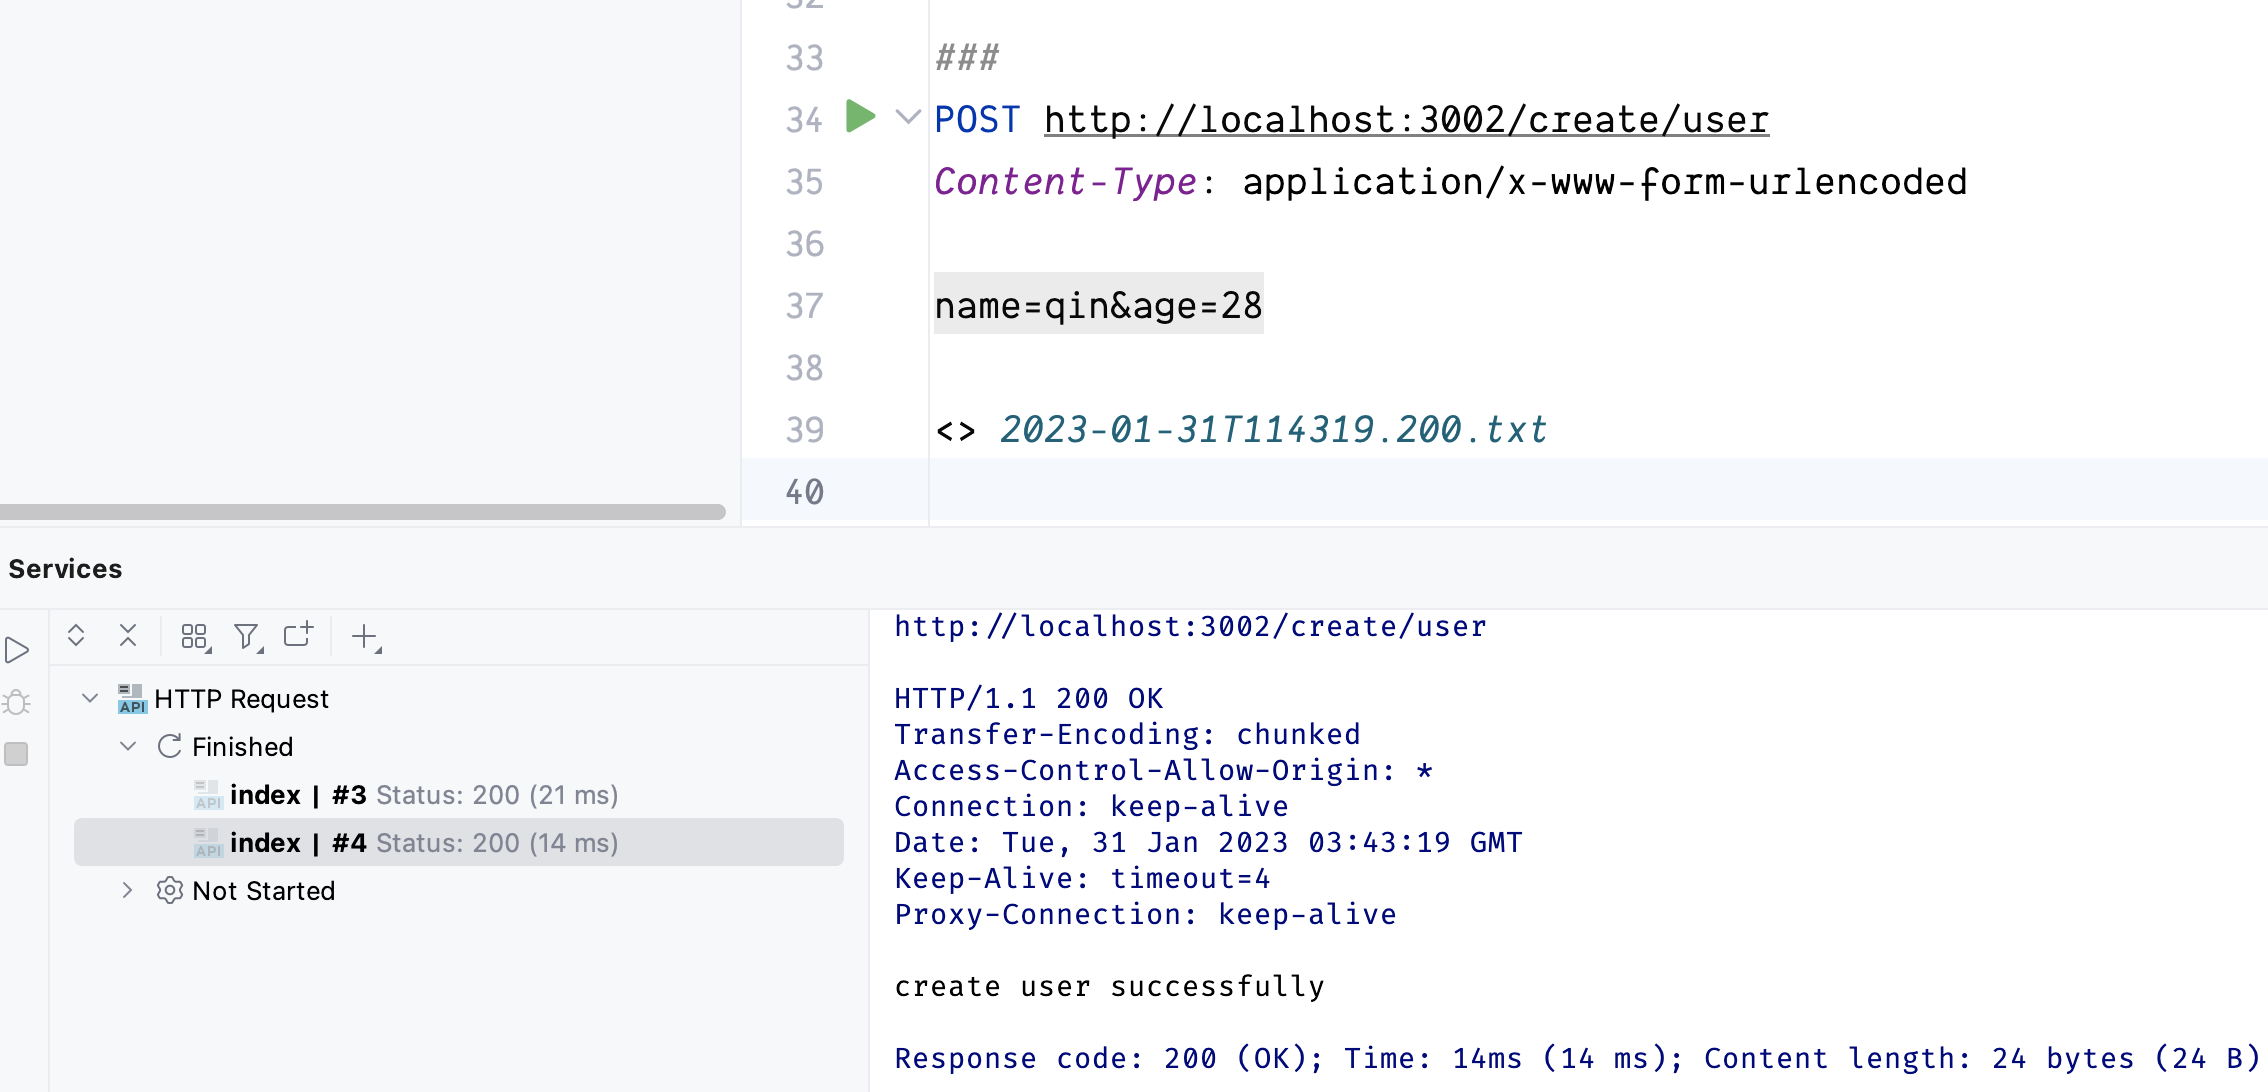
Content-Type: application/x-www-form-urlencoded
name=qin&age=28
点击 图标,Rest Client 发起 POST 请求,请求结果如下图所示
使用方式如下 https://api.com/users?name=qinghuanI
# multipart/form-data
当我们使用 form-data 格式传递文本字段时,使用方式如下
# index.http

POST http://localhost:80/api/item
Content-Type: multipart/form-data; boundary=WebAppBoundary

--WebAppBoundary
Content-Disposition: form-data; name="field-name"

field-value
--WebAppBoundary--
当我们上传文件的时候,可以使用 FormData 上传文件内容。使用方式如下
#index.http

POST http://localhost:80/api/item
Content-Type: multipart/form-data; boundary=WebAppBoundary

--WebAppBoundary
Content-Disposition: form-data; name="field-name"; filename="file.txt"

< ./relative/path/to/local_file.txt
--WebAppBoundary--
# text/xml
平常用的很少,暂时不做过多讨论
# PATCH/DELETE/PUT
像 PATCH/DELETE/PUT 等请求方法用法跟 GET 和 POST 差不多,就不再这里讲述